This is the time your secret weapon, Camouflage Makeup, comes to the rescue!

If you have a great deal of discoloration, scars, bruises, birthmarks, etc., you will want to camouflage first by blocking out the problem before applying foundation. Camouflage makeup adheres best when applied directly on the skin. Then go back, over the camouflaged areas with your skin toned foundation, contour and color, to add dimension.
Your goal is to create a canvas that is smooth and flawless by melding the two types of makeup together. If done correctly you will not see a line of demarcation between the camouflage makeup and your foundation. In some cases, the camouflage makeup will be all you need if the problem covers a large area of the face or body.
COLOR
Most people need to blend 2 to 3 colors in order to achieve the correct shade to camouflage the problem. While “The Blocking Technique” is essentially the same for each situation, it is the colors you use that create the magic!
Never “block out” with a color that is lighter than your natural skin tone. You will never be able to achieve a natural color between the camouflaged area and the rest of your skin.
CONSISTENCY
Camouflage makeup is heavier with more pigment than regular concealer and foundation. It needs to be warmed by the heat of your fingers to create a smooth “buttery” finish before applying to the skin. You’ve got to work it to achieve the best coverage. If necessary, you can layer up to three times.
After application, let it set a minute. The product will firm up again going back to its original consistency which ensures staying power.
TECHNIQUE
1 Use the back of your hand as a blending palette. This will provide a more even application than blending directly on your skin.
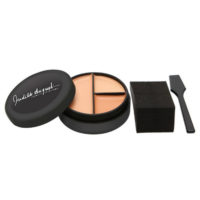
2 Take the edge of a spatula and “shave off” a small amount of product and put it on your hand. You need very little of it because it is so concentrated.
3 Start with a quarter size amount in the color closest to your “natural skin tone”. Then, place a small dab of a lighter and a darker tone next to it. Using your fingertips, blend colors together to create your perfect shade. The warmth of your fingers will “liquefy” the product for smoother application.
4 Take your non-latex blending sponge and pick up the product from your hand. Tap the makeup onto the affected area using a slight “rolling” motion. By doing this you will not lift the makeup off the skin; you are blending into the skin.
Don’t forget your NO NO words:
NO STROKING, NO SMEARING.
5 Feather out the edges until the makeup blends seamlessly into the skin.
6 Continue with your normal foundation around and/or on top of the camouflaged area until you have achieved even coverage.
7 Set your artwork with loose translucent powder using a powder puff. Let it set for three minutes. Buff off excess with a powder brush.
If you look too powdery a light mineral water finishing spray can be used or, the “warm hand technique”.
TOUCHING UP
If you need touch up during the day, use a pressed powder compact in a natural skin toned color, not a translucent color. It will refresh your makeup to its natural hue.